

My Moonlander became a big sister this week! I've loved the Moonlander since the day I got it, and little sister Voyager was an instant-buy for me when ZSA announced it a couple of weeks ago.

Like the Moonlander, the Voyager is gorgeously, impeccably built. I'm loving the low-profile keys (though I am going to do some sound profile optimization at some point), and the magnetic base plate is perfect for my existing setup! Starting from the outside in:
I have a standing desk with a keyboard tray, and the tray has Velcro dots stuck to it to grab onto the wooden lap desk the keyboard itself is on (that'll make sense in a few paragraphs, promise! 😁).
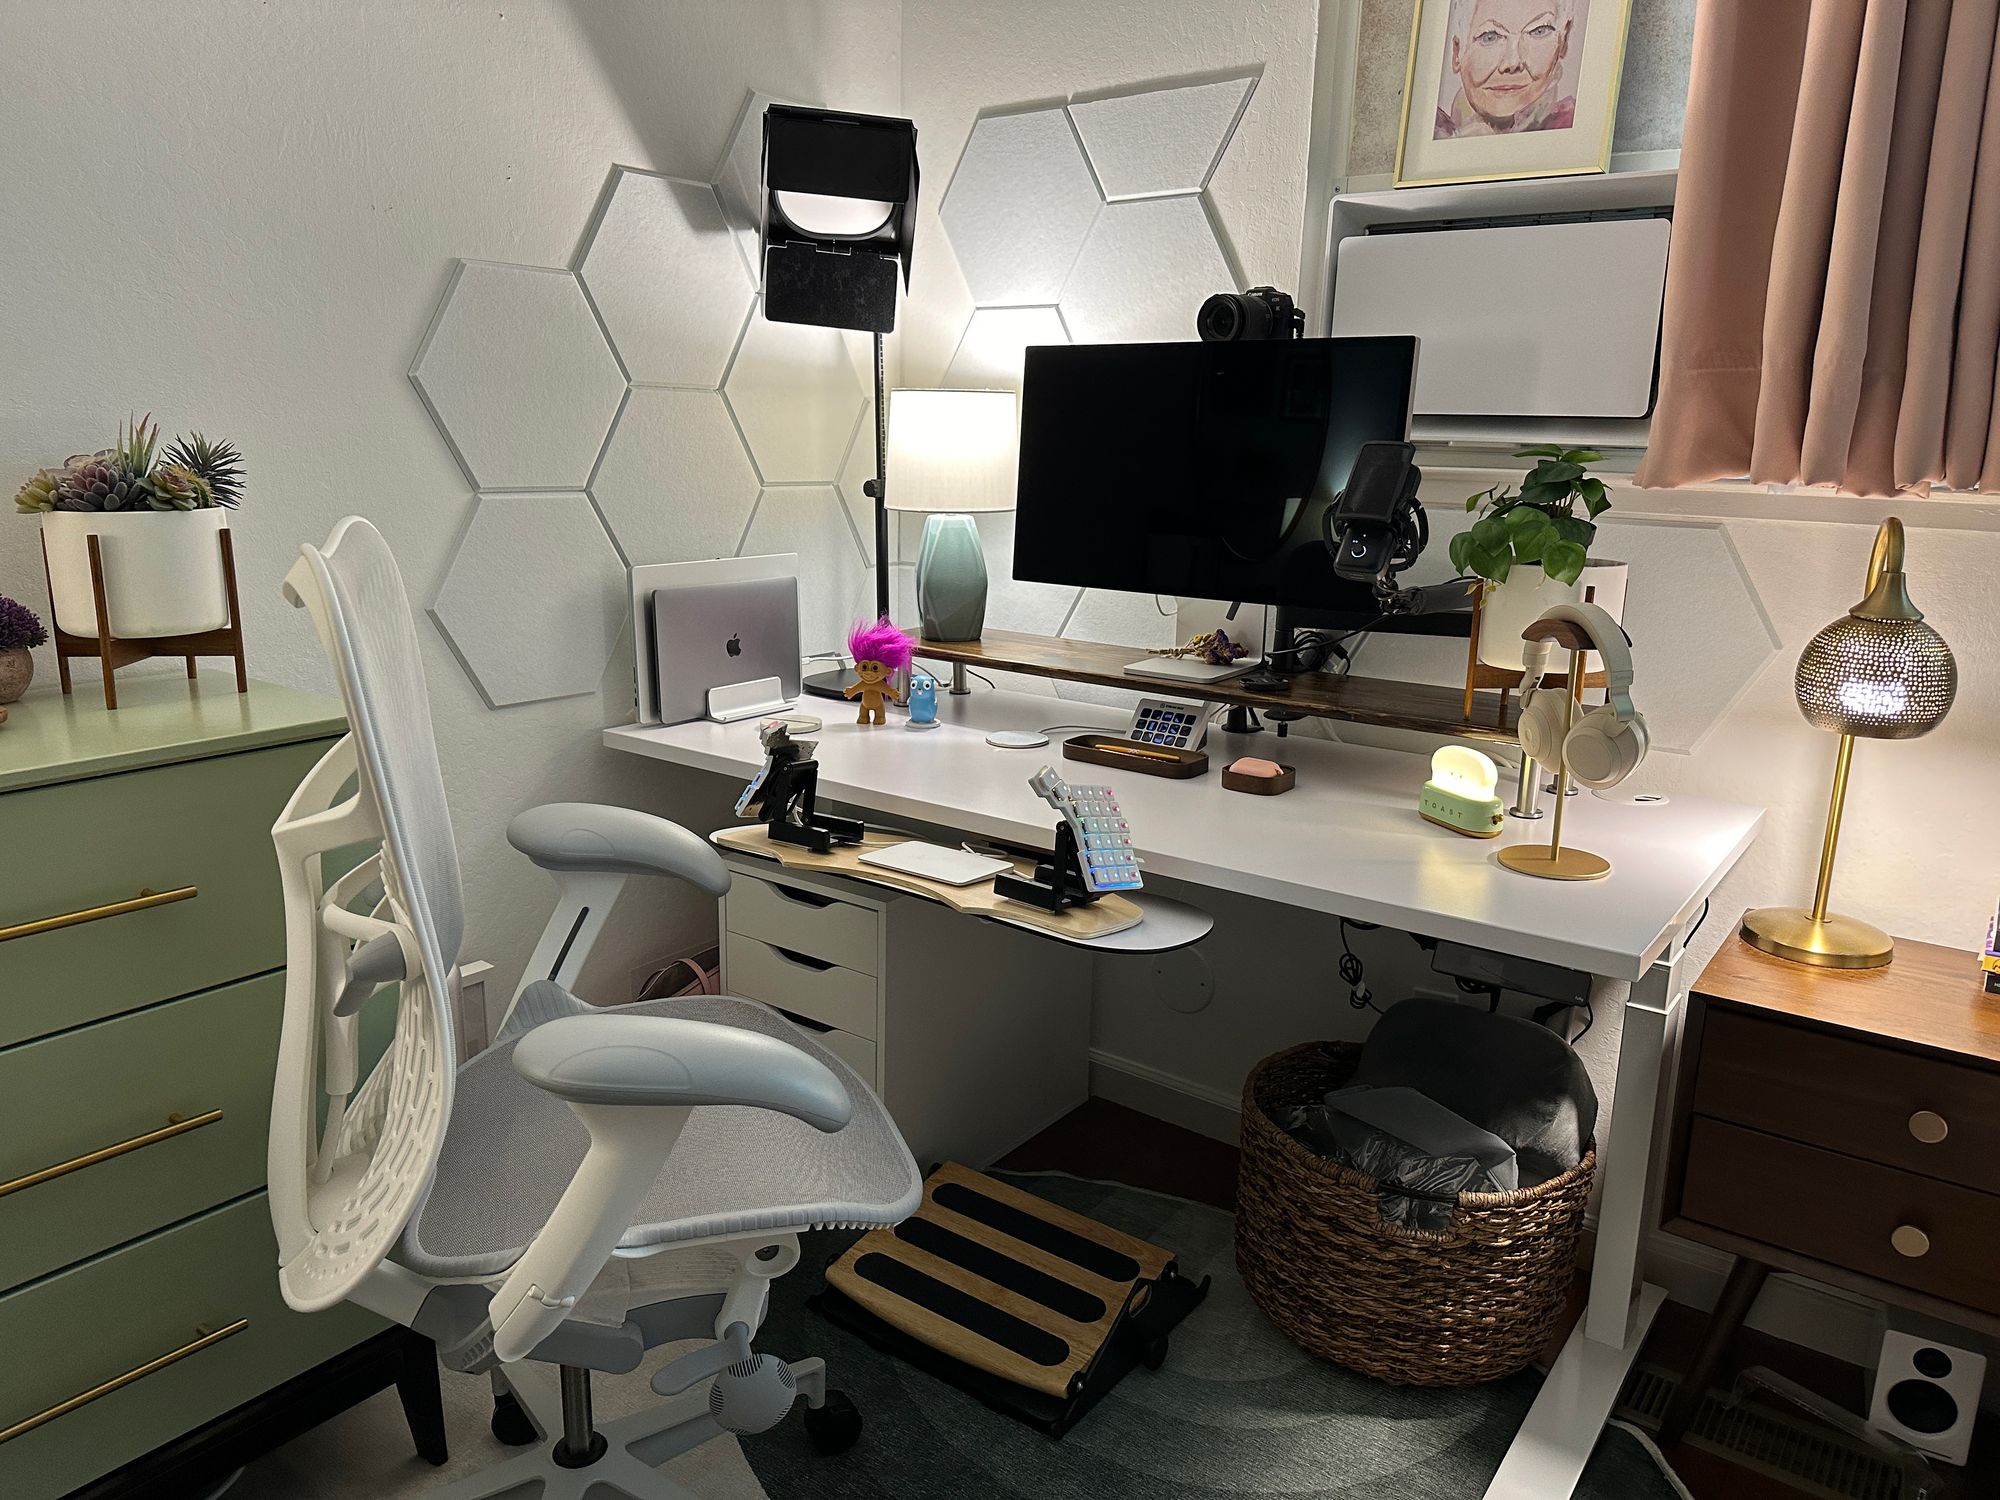
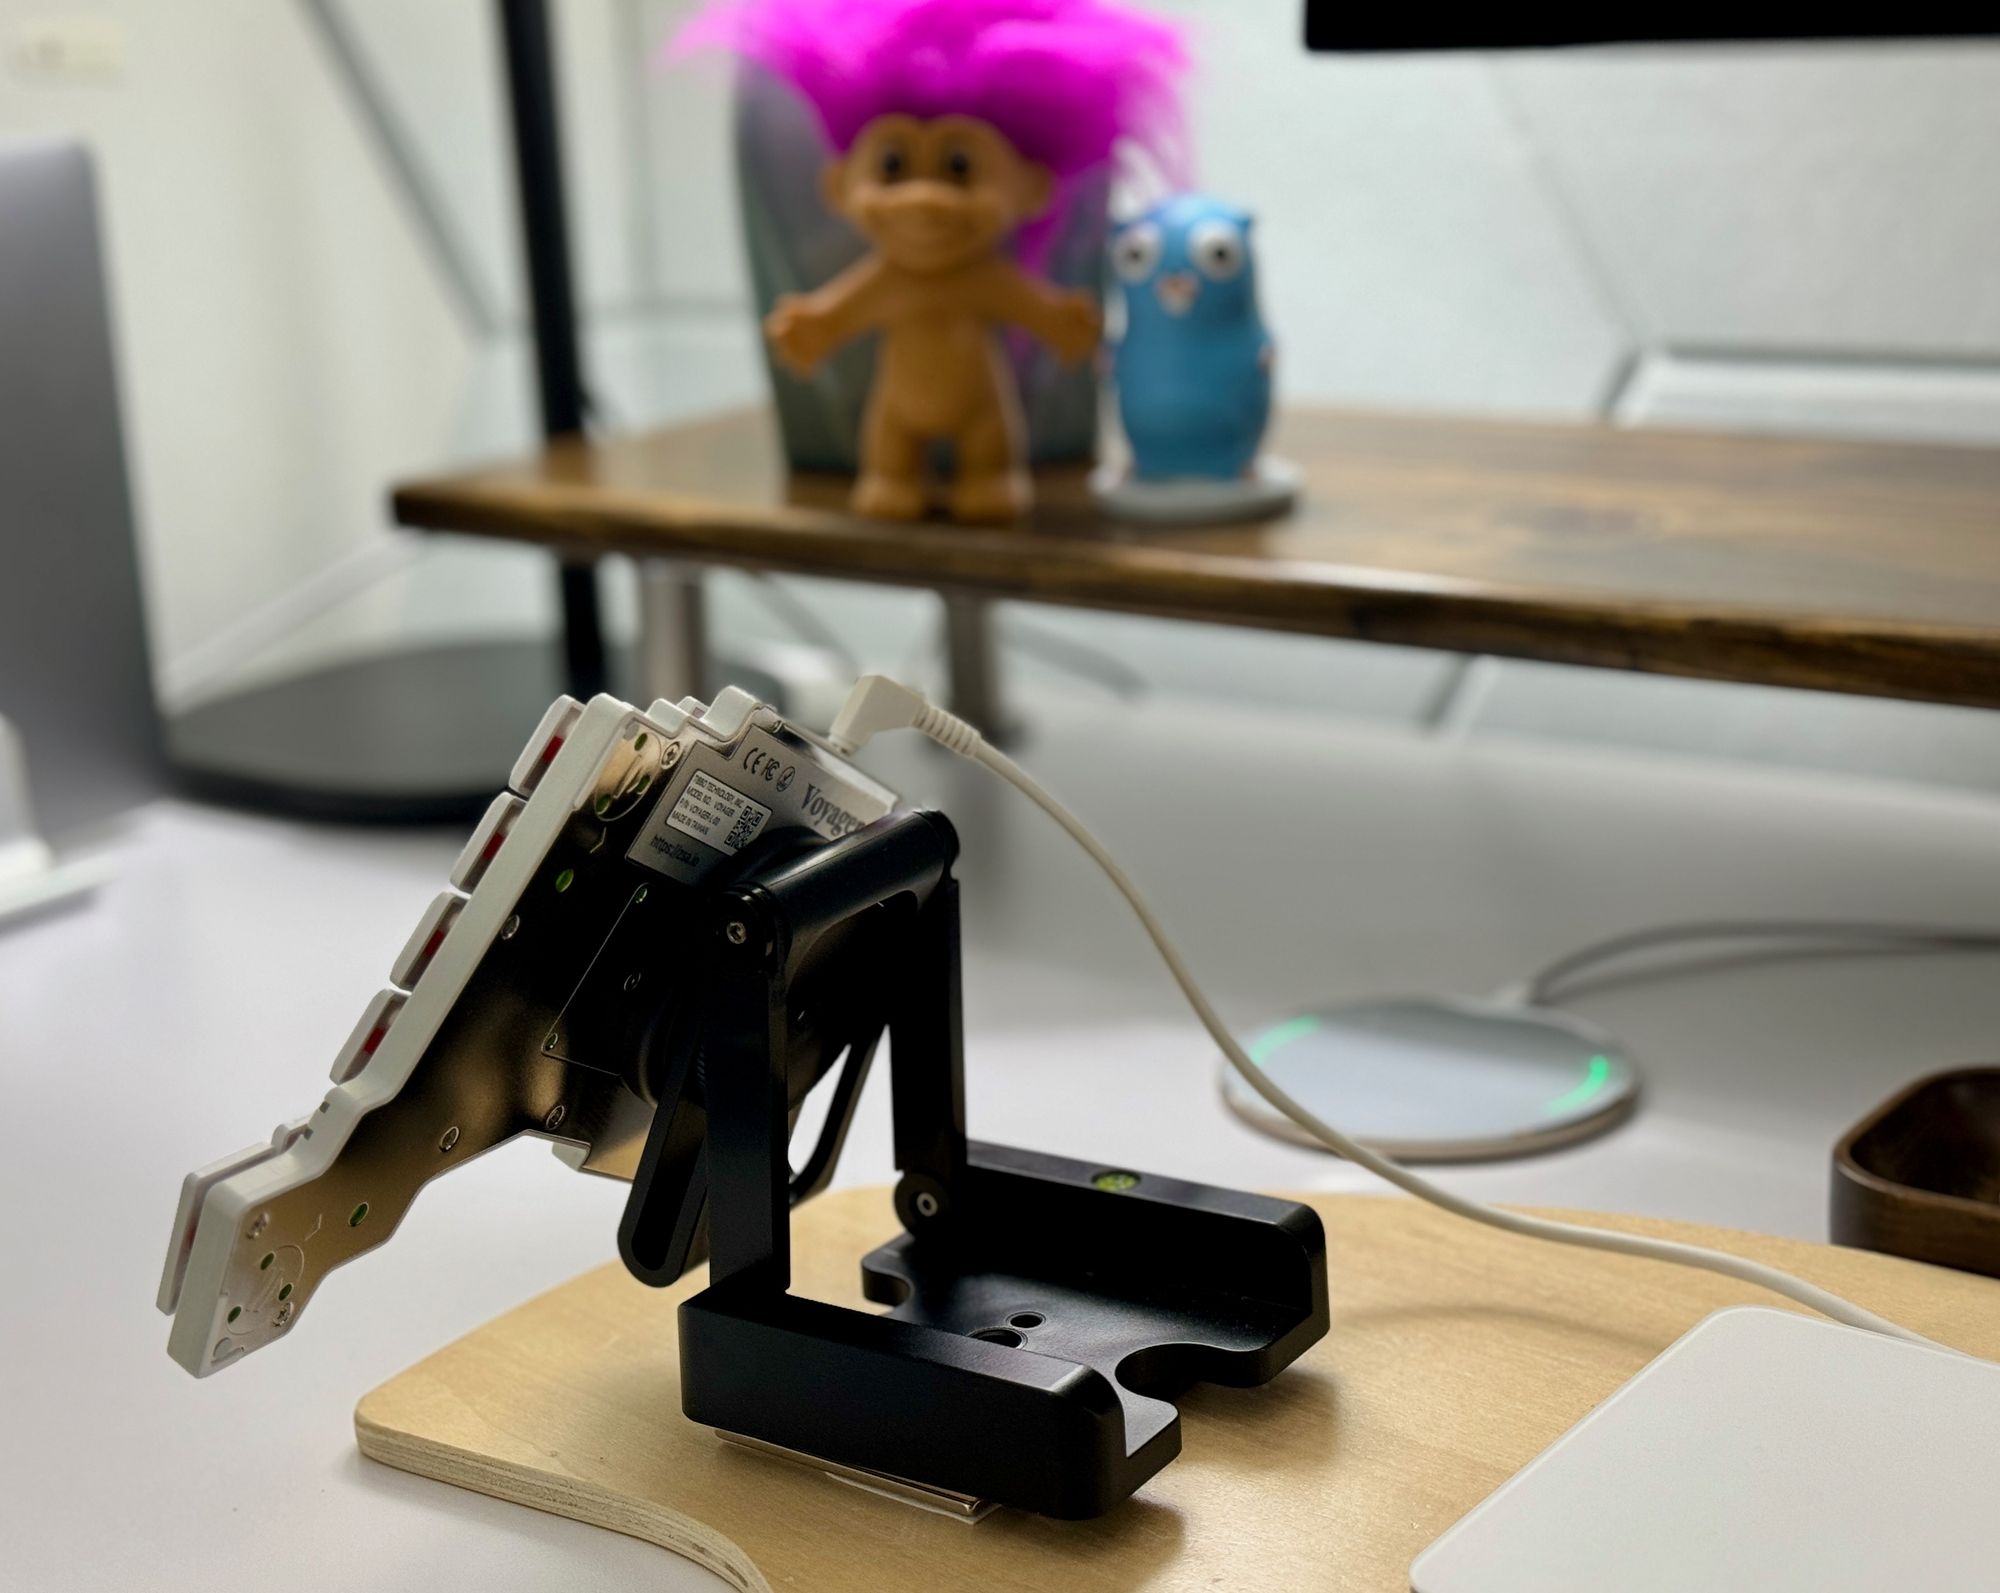
I like a steep, steep tent for my keebs, and for the Moonlander I added MagSafe stickers to the base so it could snap on to a Z-shaped adjustable camera mount with a MagSafe magnet attached. The Moonlander actually has a camera mount kit which I tried first, but I found I needed to be able to rotate the angle of the board depending on the position I was in. And since the entire base of the Voyager is magnetic, I have even more degrees of freedom with it! You can see below how the angle of the base of the Voyager relative to the lap desk supporting it is nearly 90 degrees, and that combined the angle of the left edge of the Voyager relative to the lap desk lets my wrist stay completely neutral. My forearm is supported by the arm of my chair, and my hand just floats alongside the keyboard.
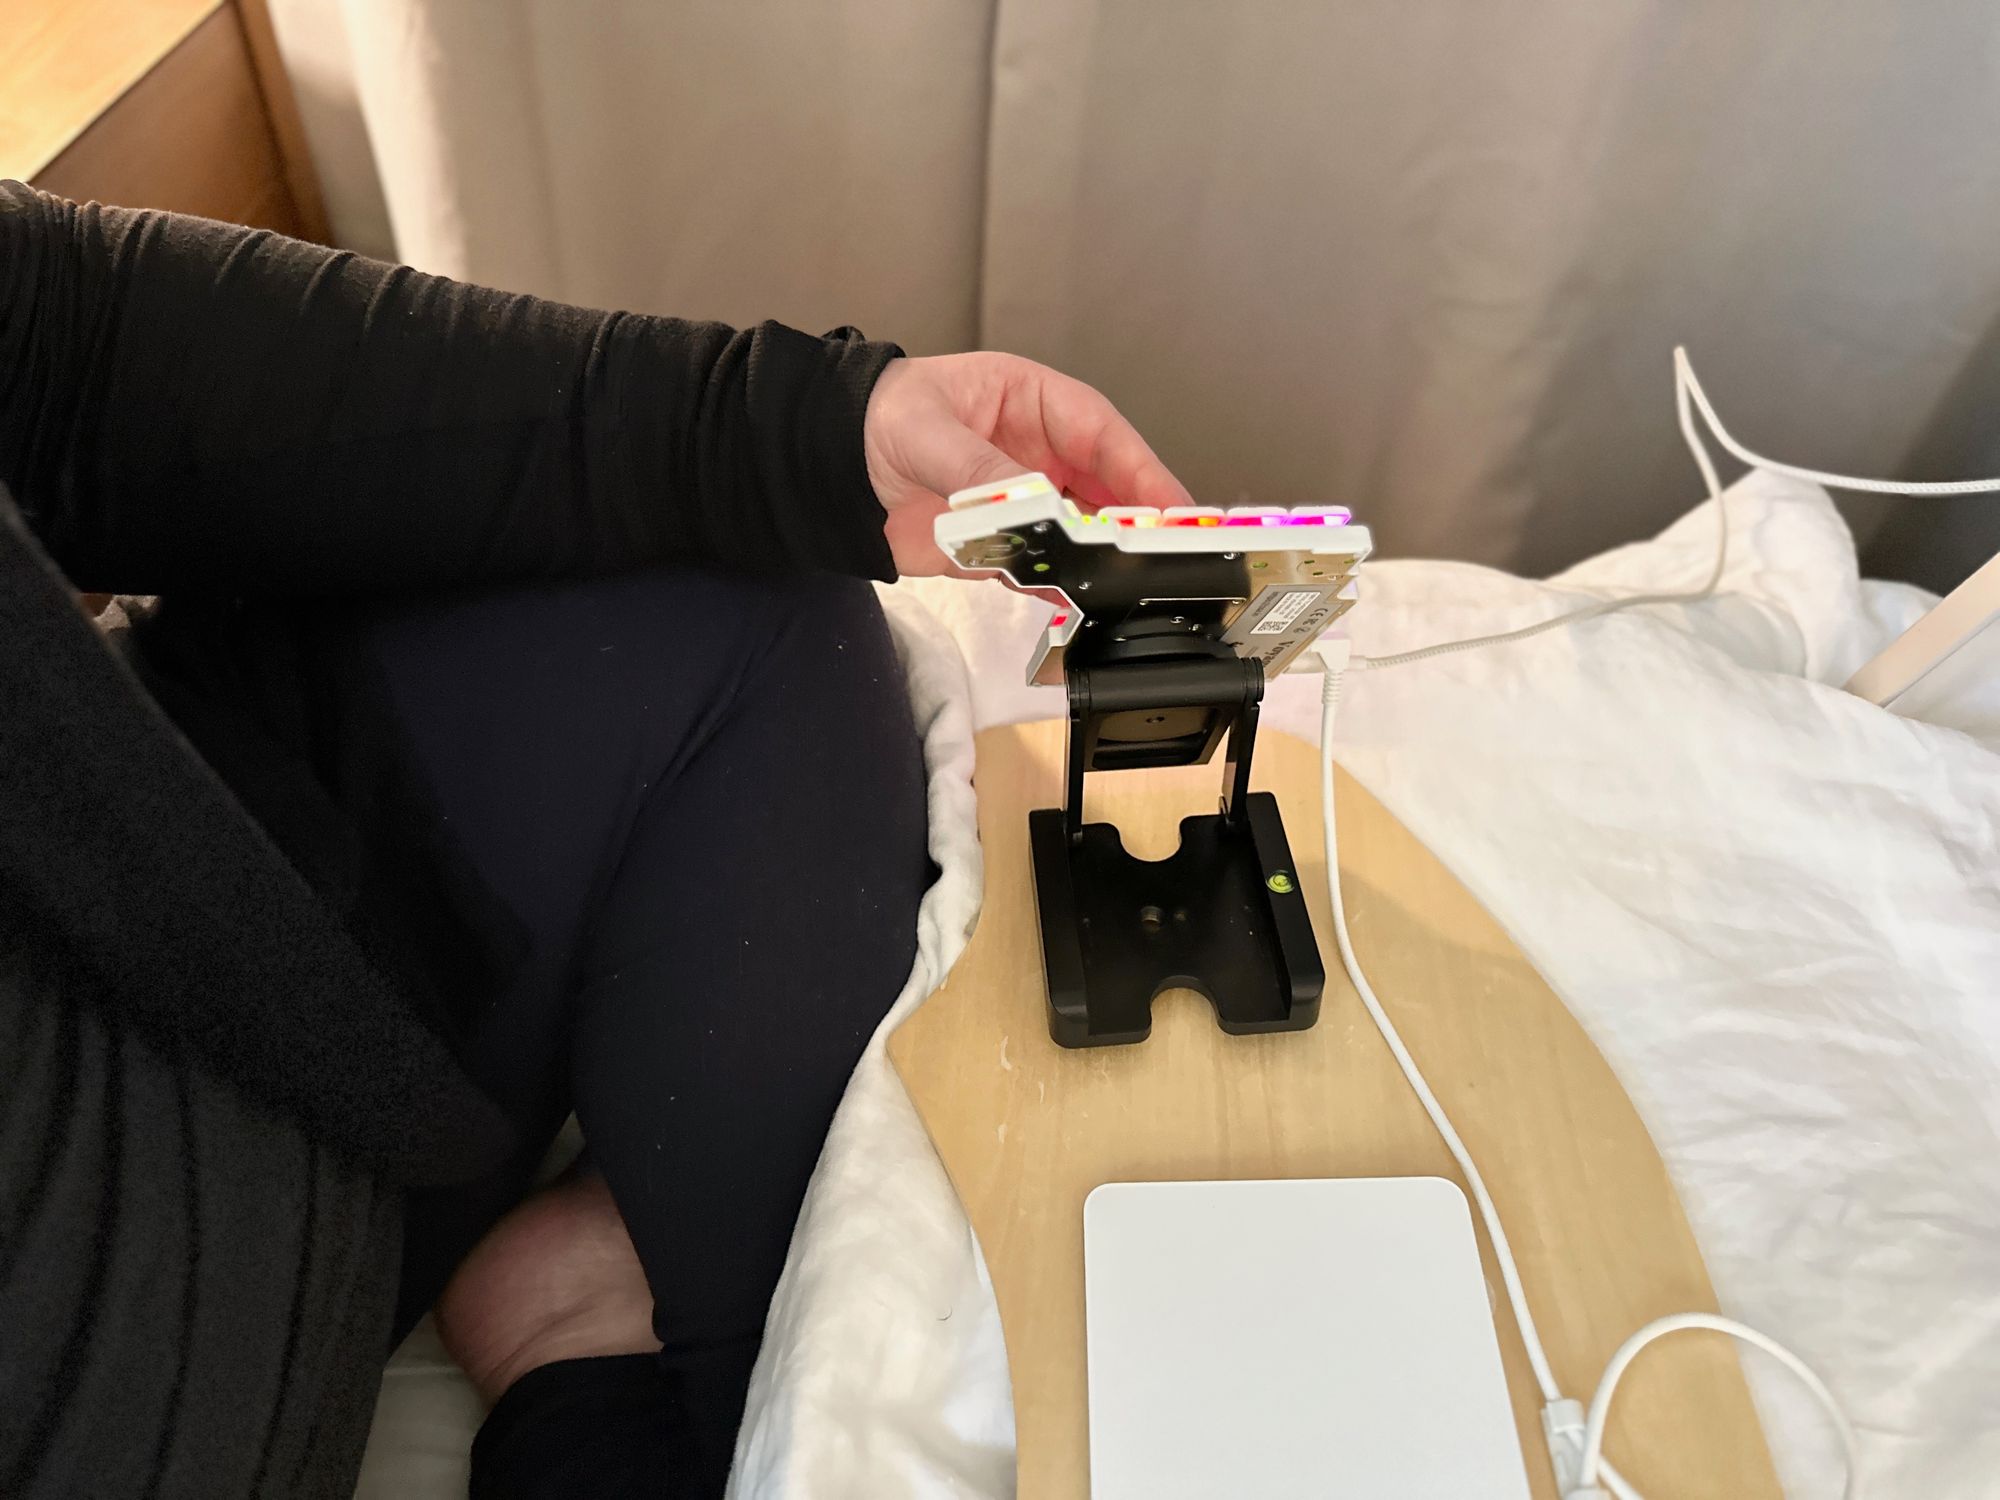
And when I want to work elsewhere, the lap desk brings my setup along! I can adjust the height and all the angles of the keyboard to give me the same ergonomic experience sitting cross-legged, or reclining in bed, or on the sofa.
The board is super light and only about 8mm thick, fitting into my backpack easily. The Z-shaped mounts are also attached with magnets, and the Voyager is designed to be compact and portable, so travelling with this setup is no problem.
I still love the Moonlander, and it's now serving as my daughter's introduction to split keebs. The Voyager and I will keep exploring new ways to optimize all the things (I already have a plan for what we'll try next!).
Nitty-gritties
I got some requests for more details about how I put everything together (folks after my own heart!). I acknowledge that there are a lot of Amazon links in here, and that Amazon is evil. I wish there were a site where I could have sourced all these things from small—or even better, local!—businesses, but in the absence of such a site I just don't have the spoons to source everything from a bunch of different sites. The links are non-affiliate, and the best I can do. My setup is heavily influenced by those of Evan Travers and Seth Milliken.
The lap desk has been trimmed down as I've iterated, and might well get smaller still. You might notice that the edge that faces my body has vertices about 1/3 of the way in on each side, because the arms of my chair were bumping the lower "corners" so I needed to cut the board in a bit to accommodate them. Everything attaches to the board in ways easy to unattach for portability purposes.
Between the keyboard halves I have a Magic Trackpad attached with Velcro dots, and the TRRS cable that connects the two halves is held tidy by an adhesive cable clip. It looks slightly less tidy than usual below, because usually I keep it tucked it under the corners of the trackpad.
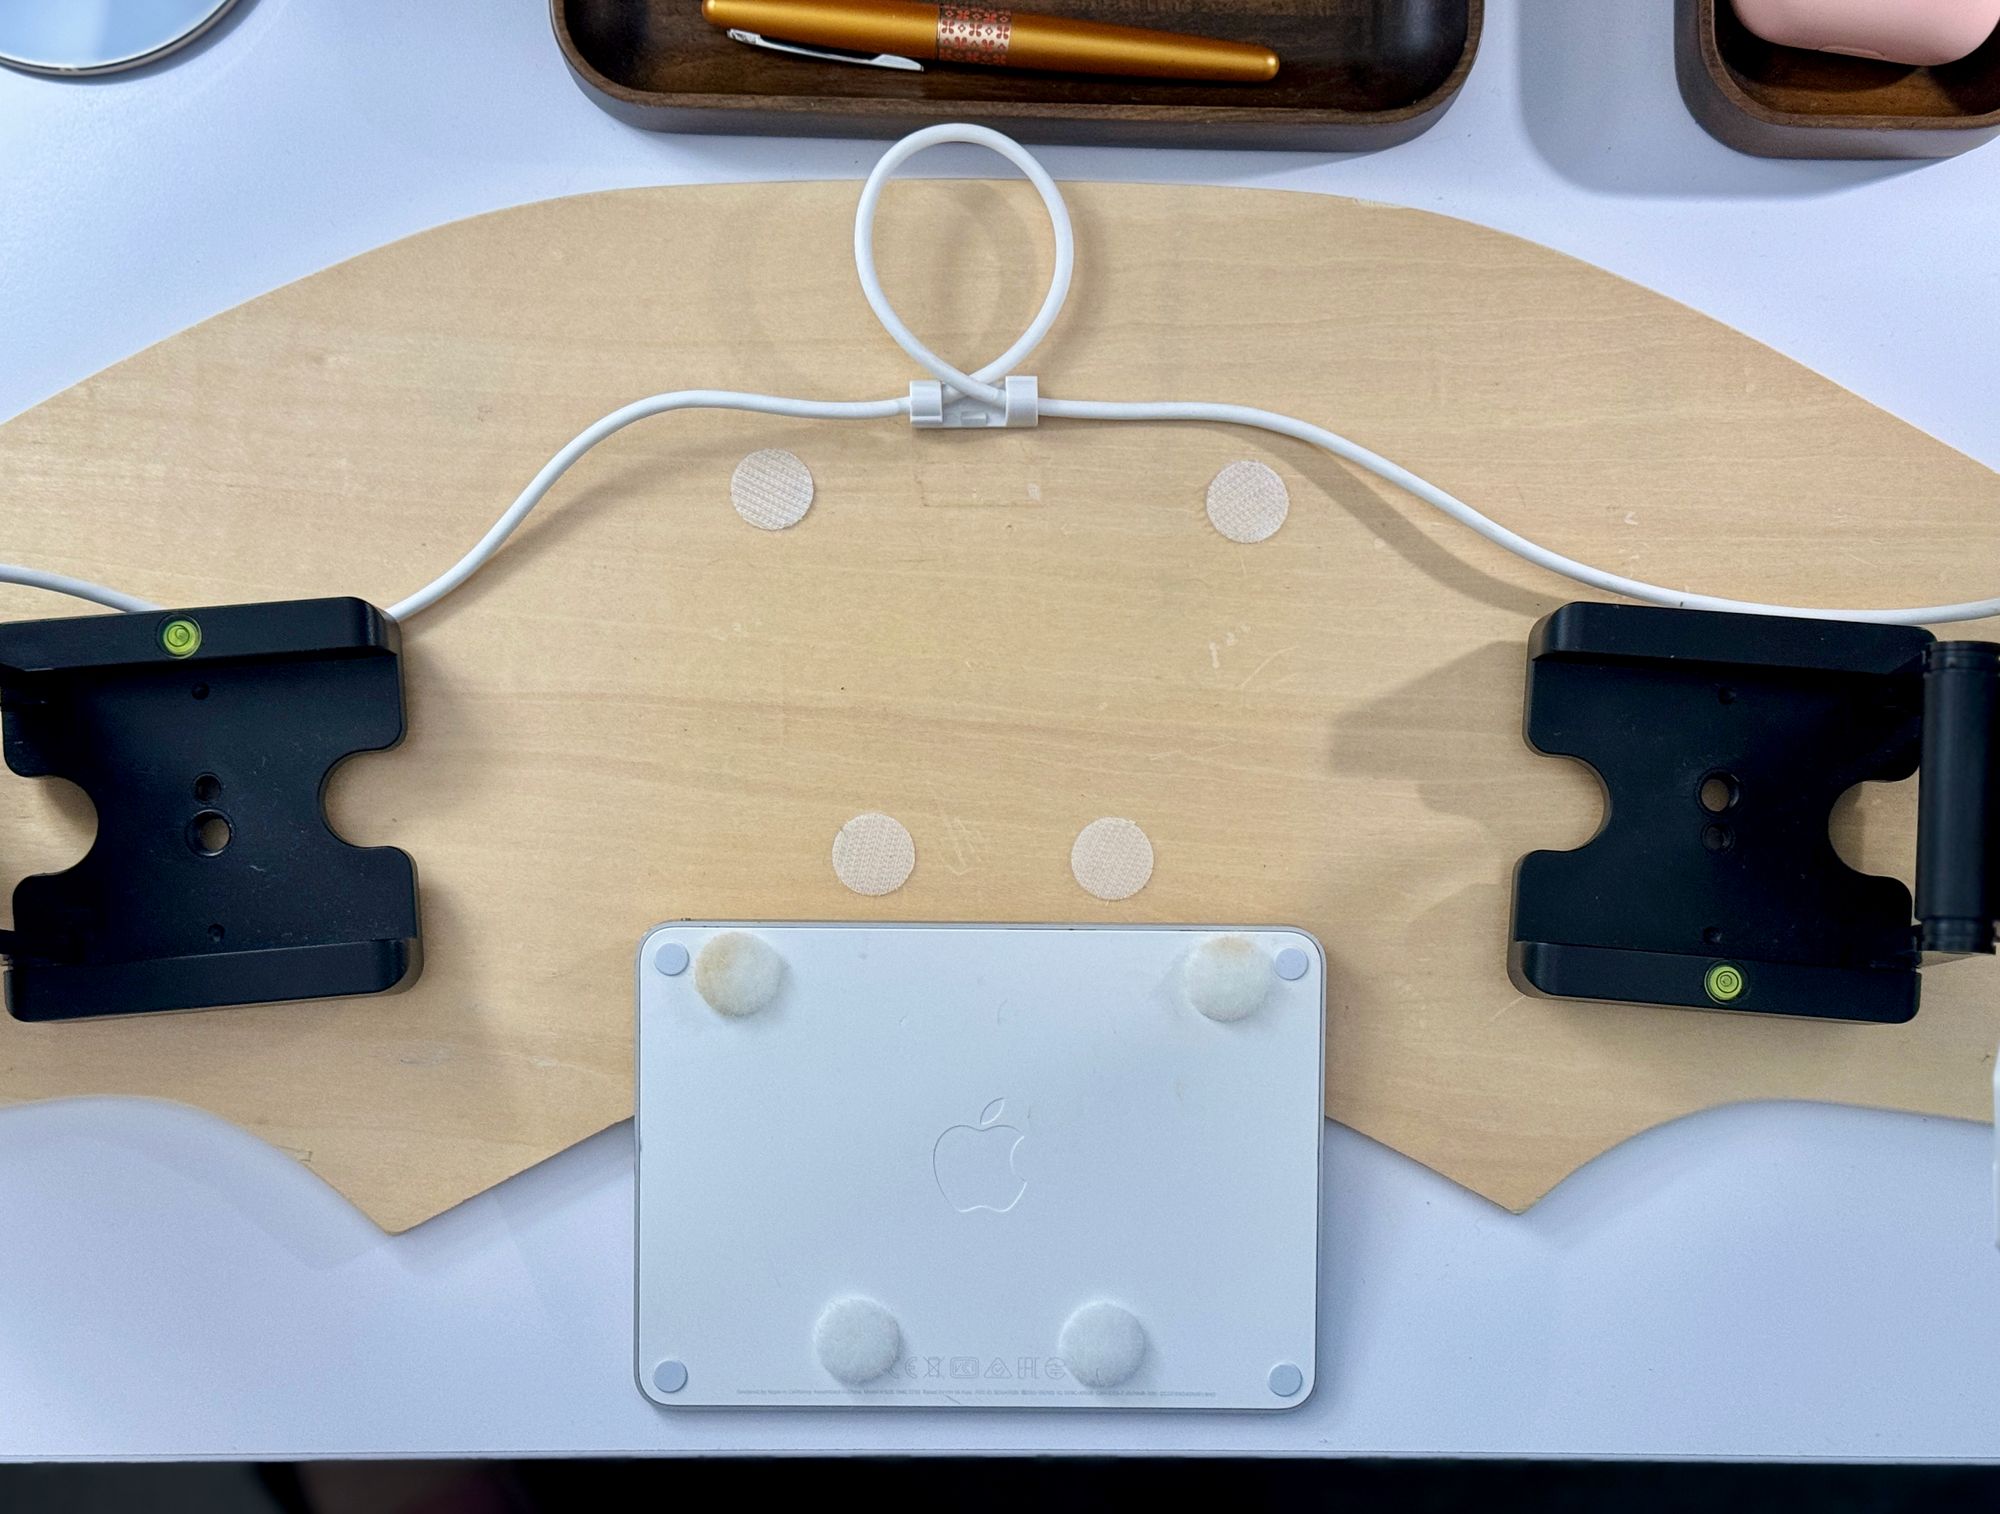
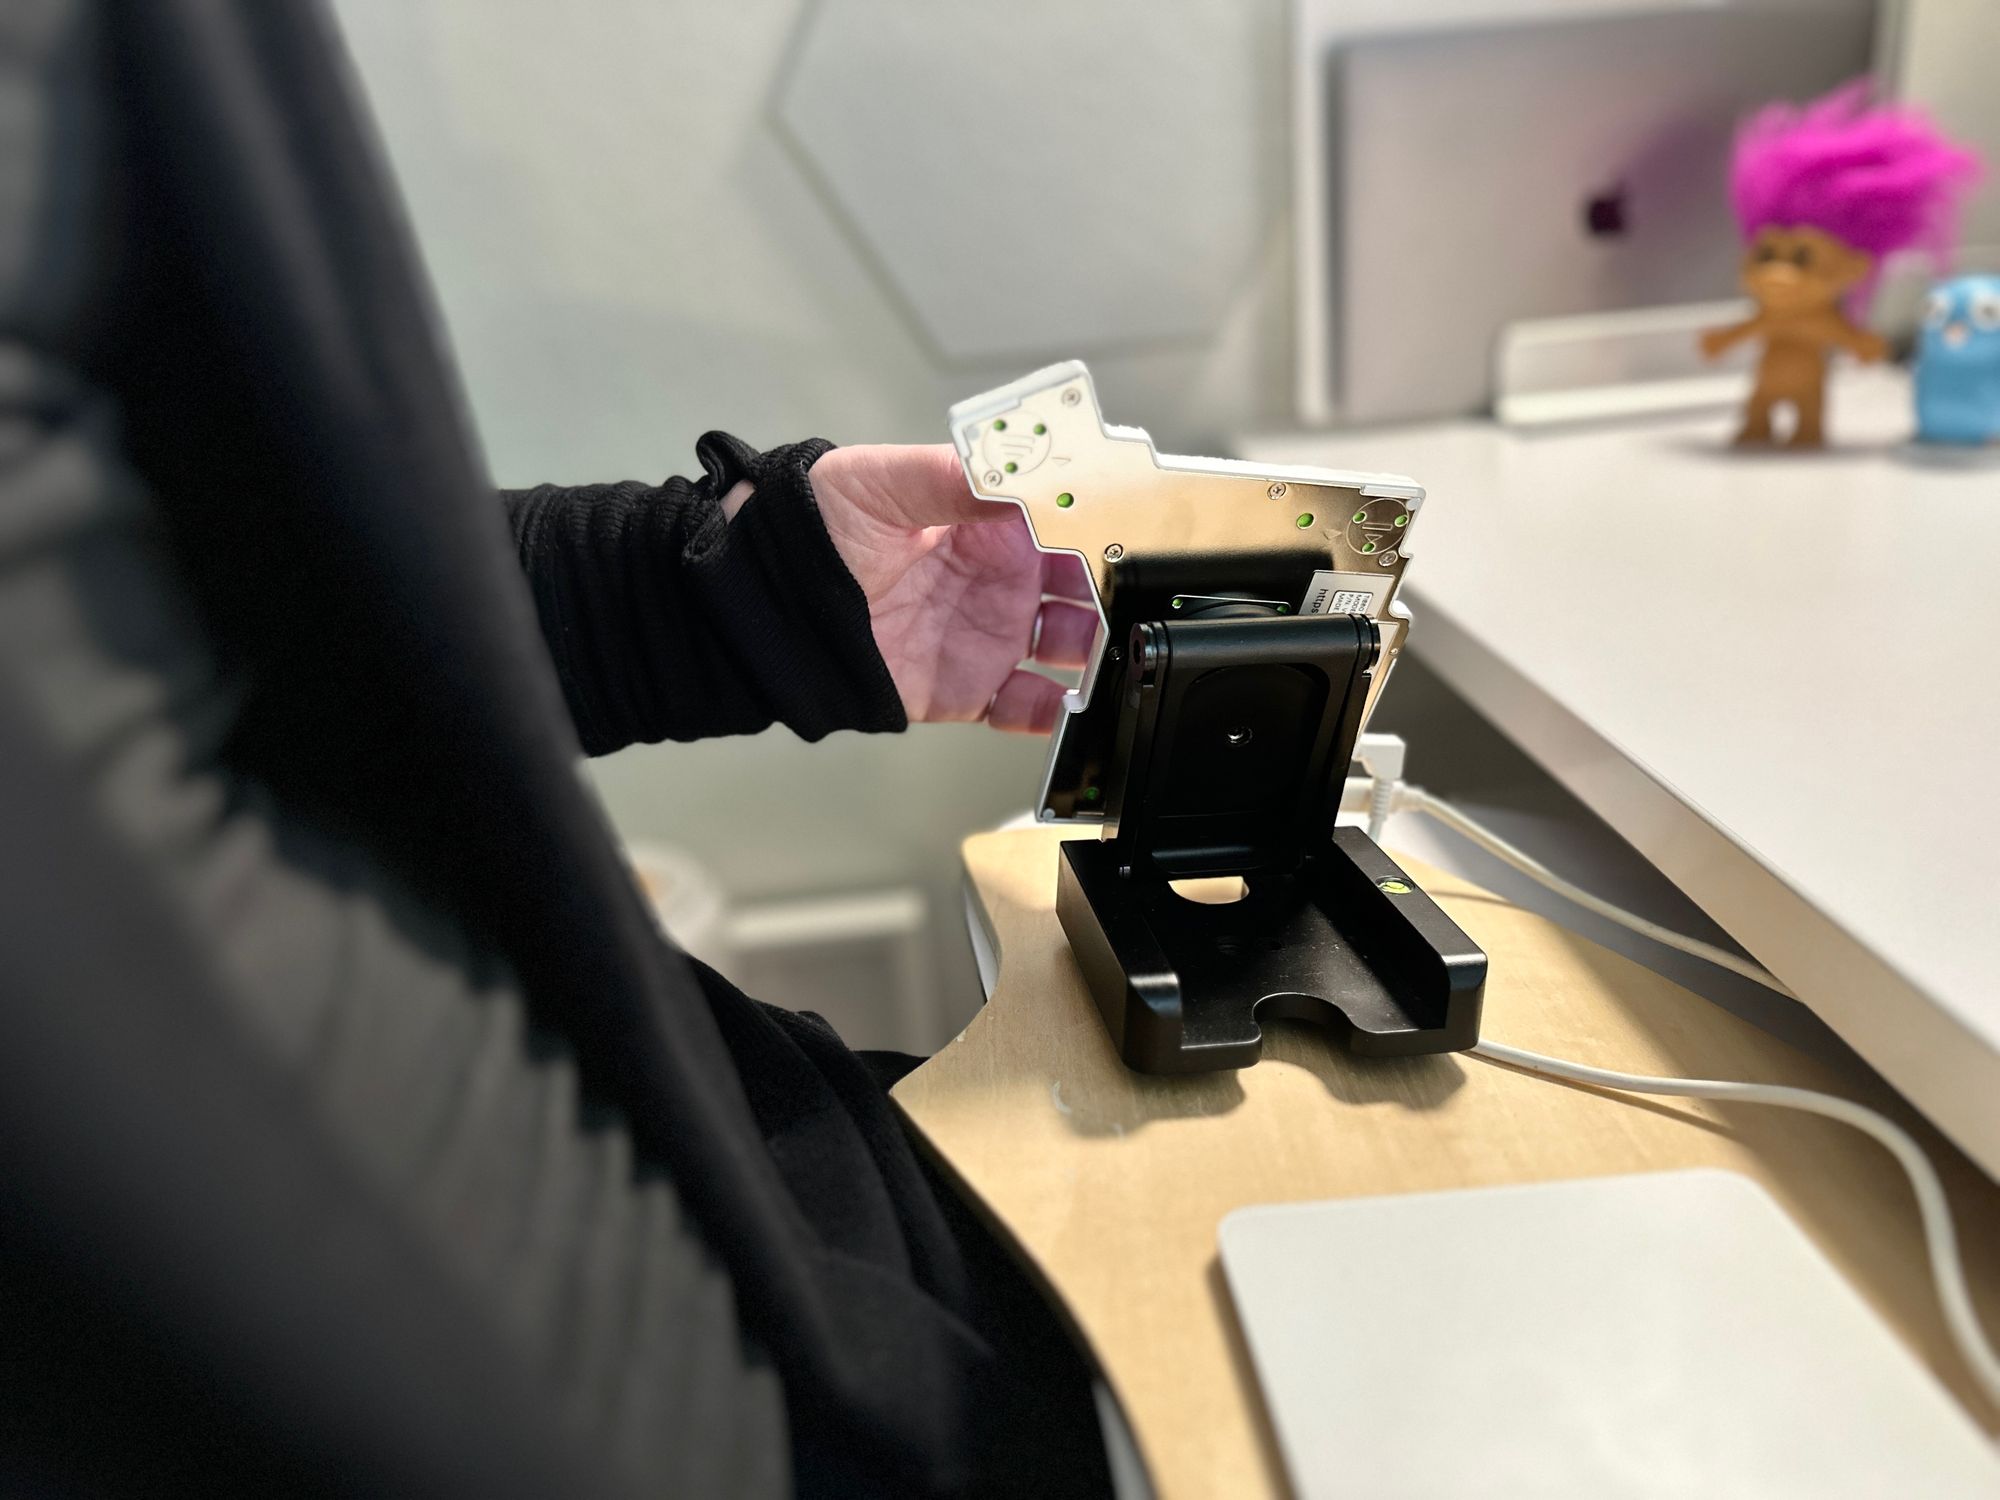
The black Z-shaped camera mounts attach to the lap desk with bar magnets:
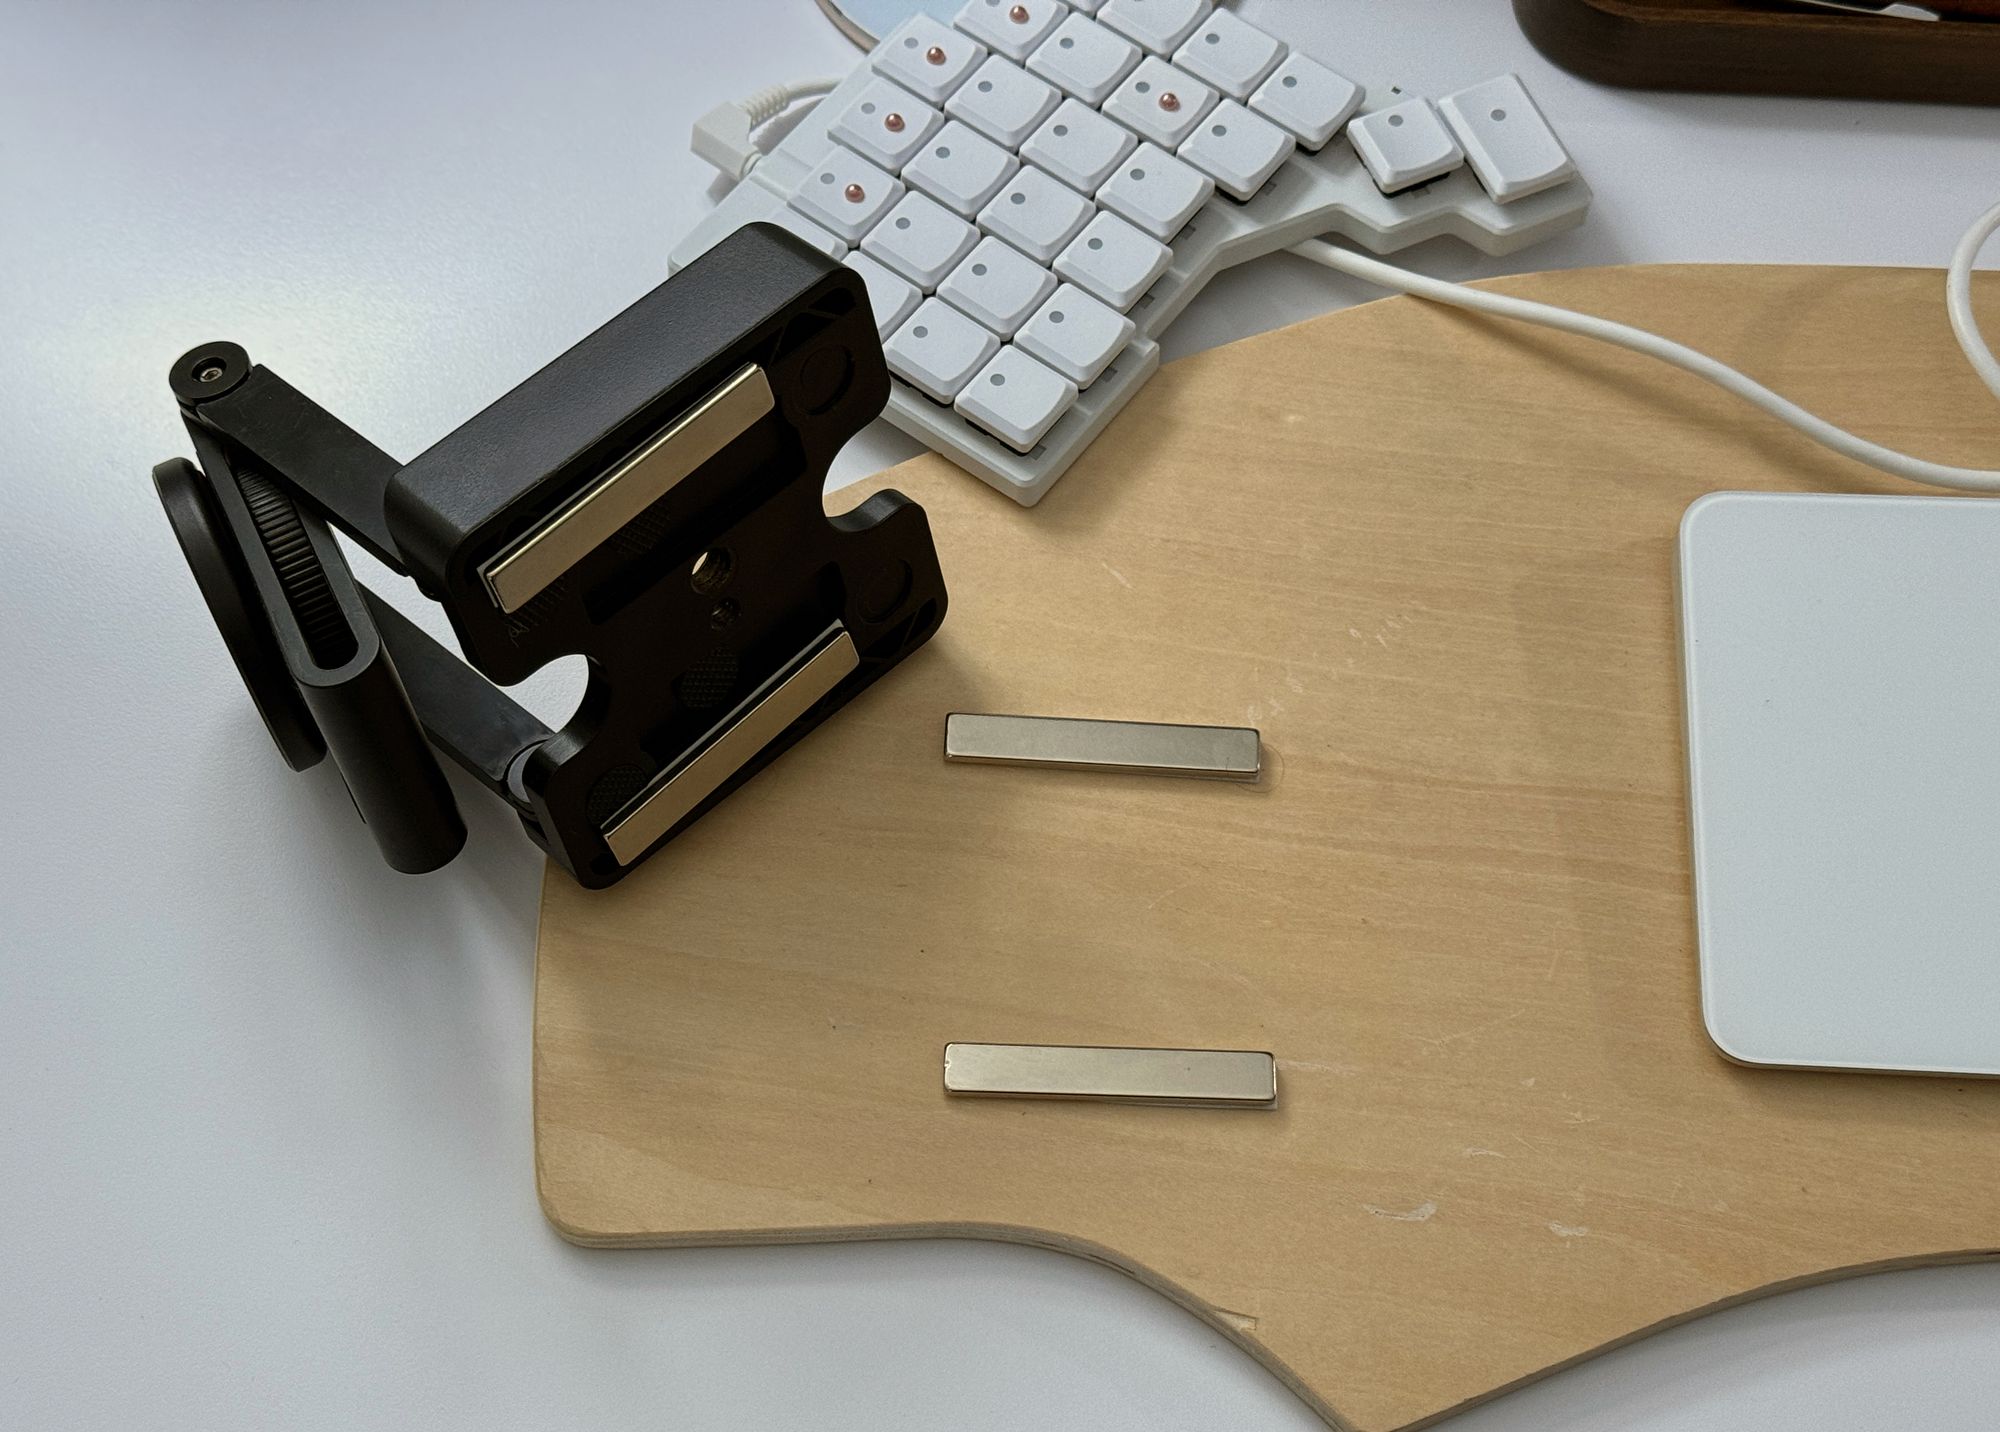
On each camera mount I've attached a MagSafe tripod mount:
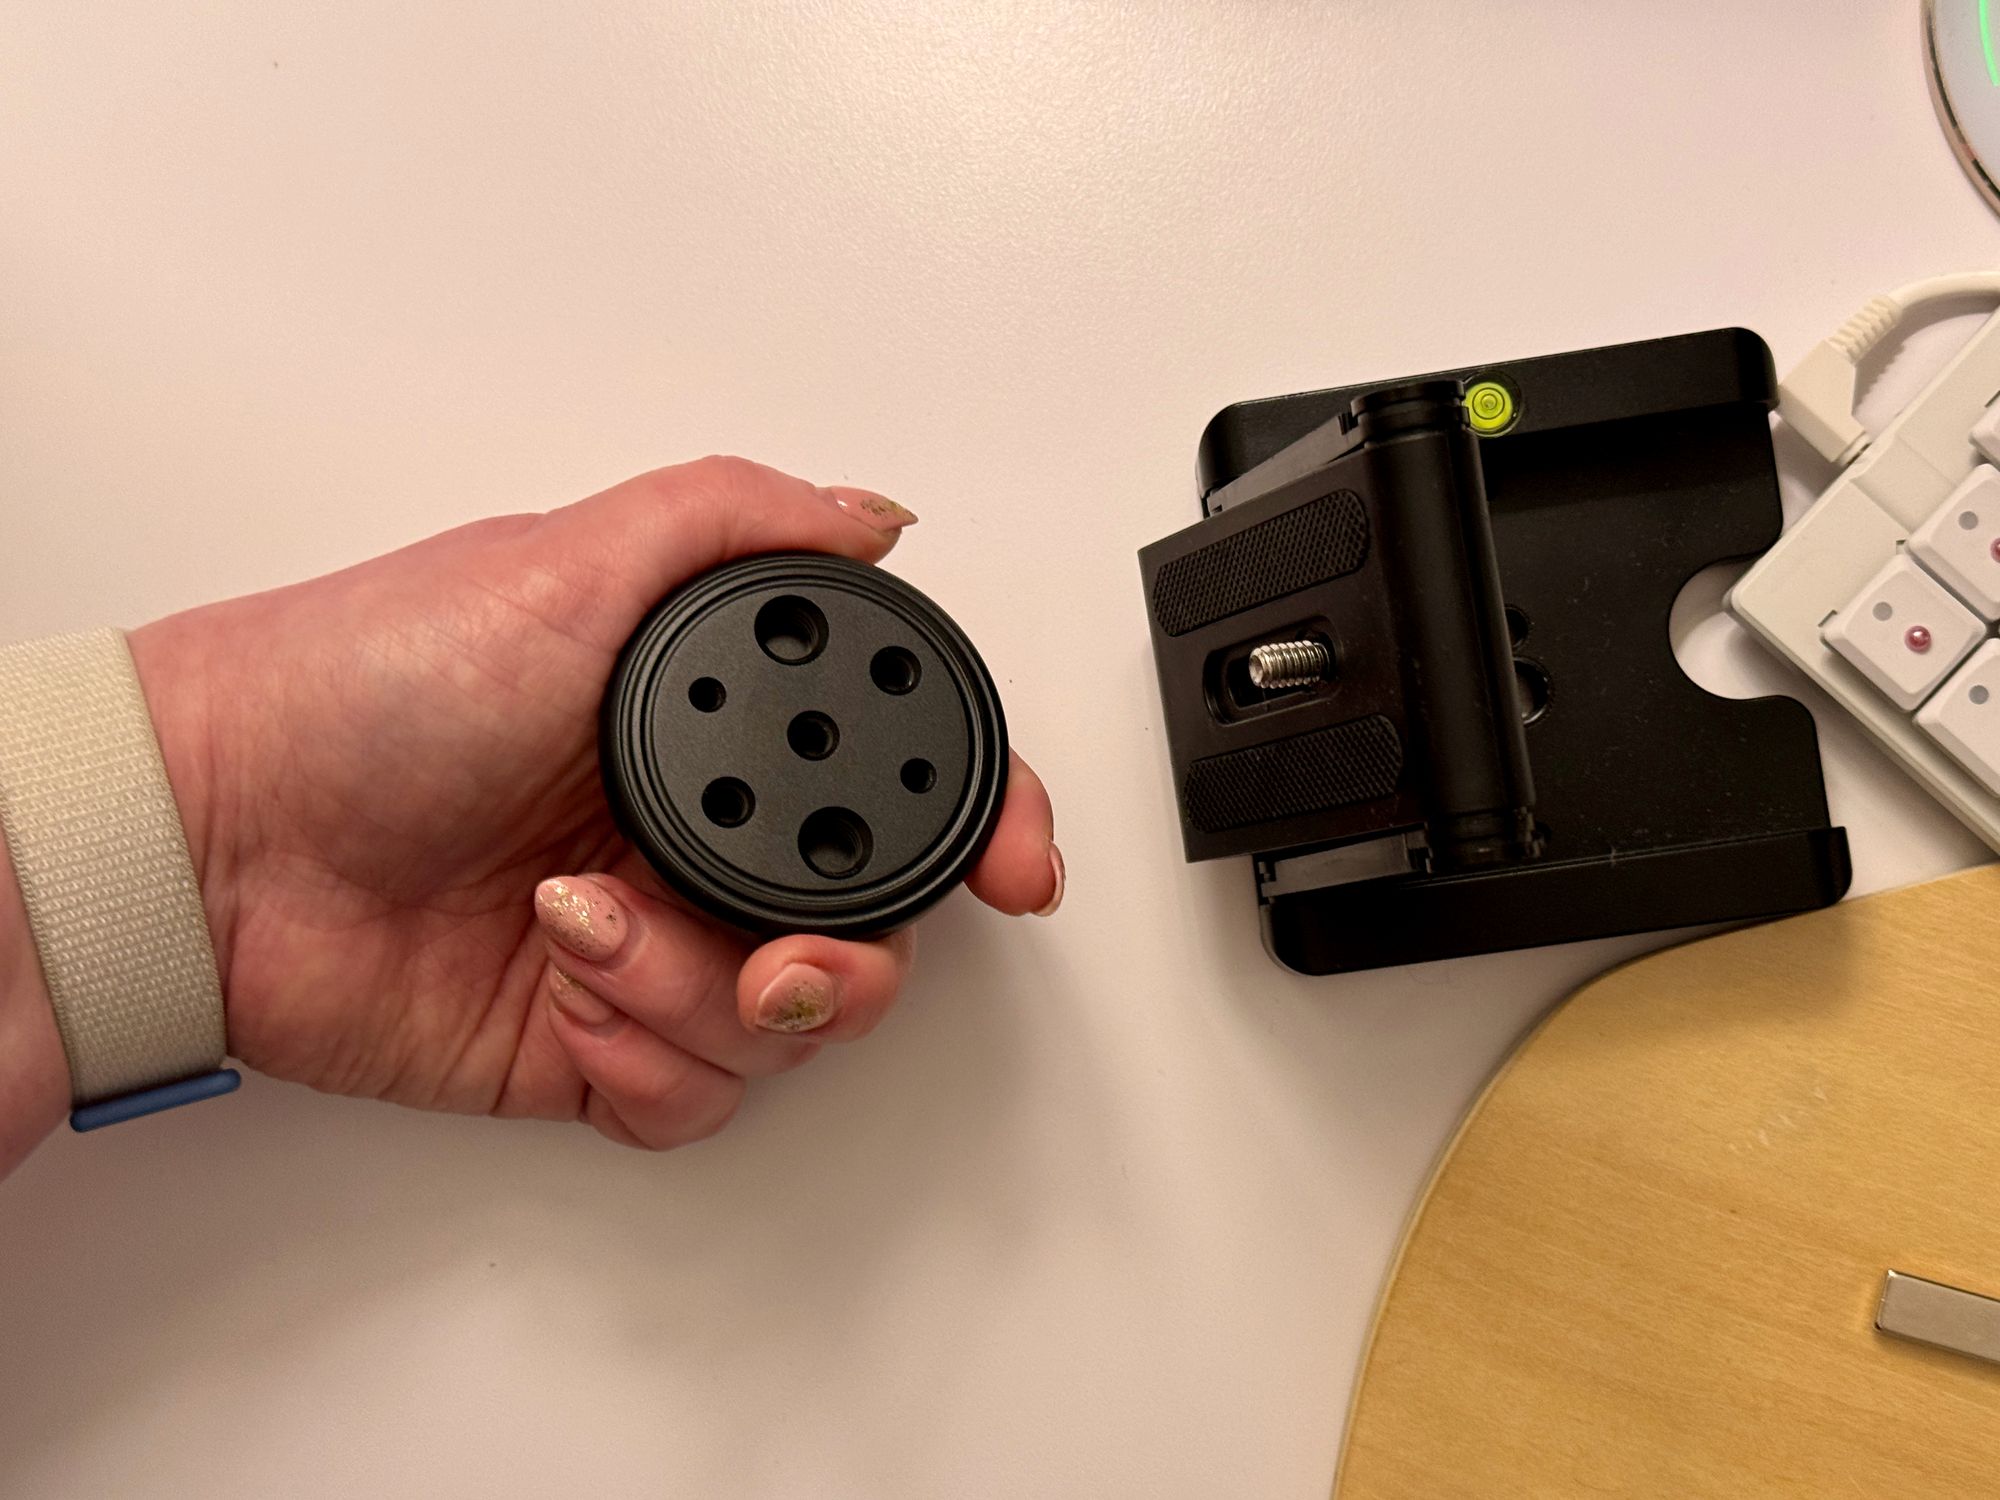
The magnetic attraction between the base of the Voyager and the tripod mount is strong. I can position the Voyager high up on the mount when I need extra height for a particular position:
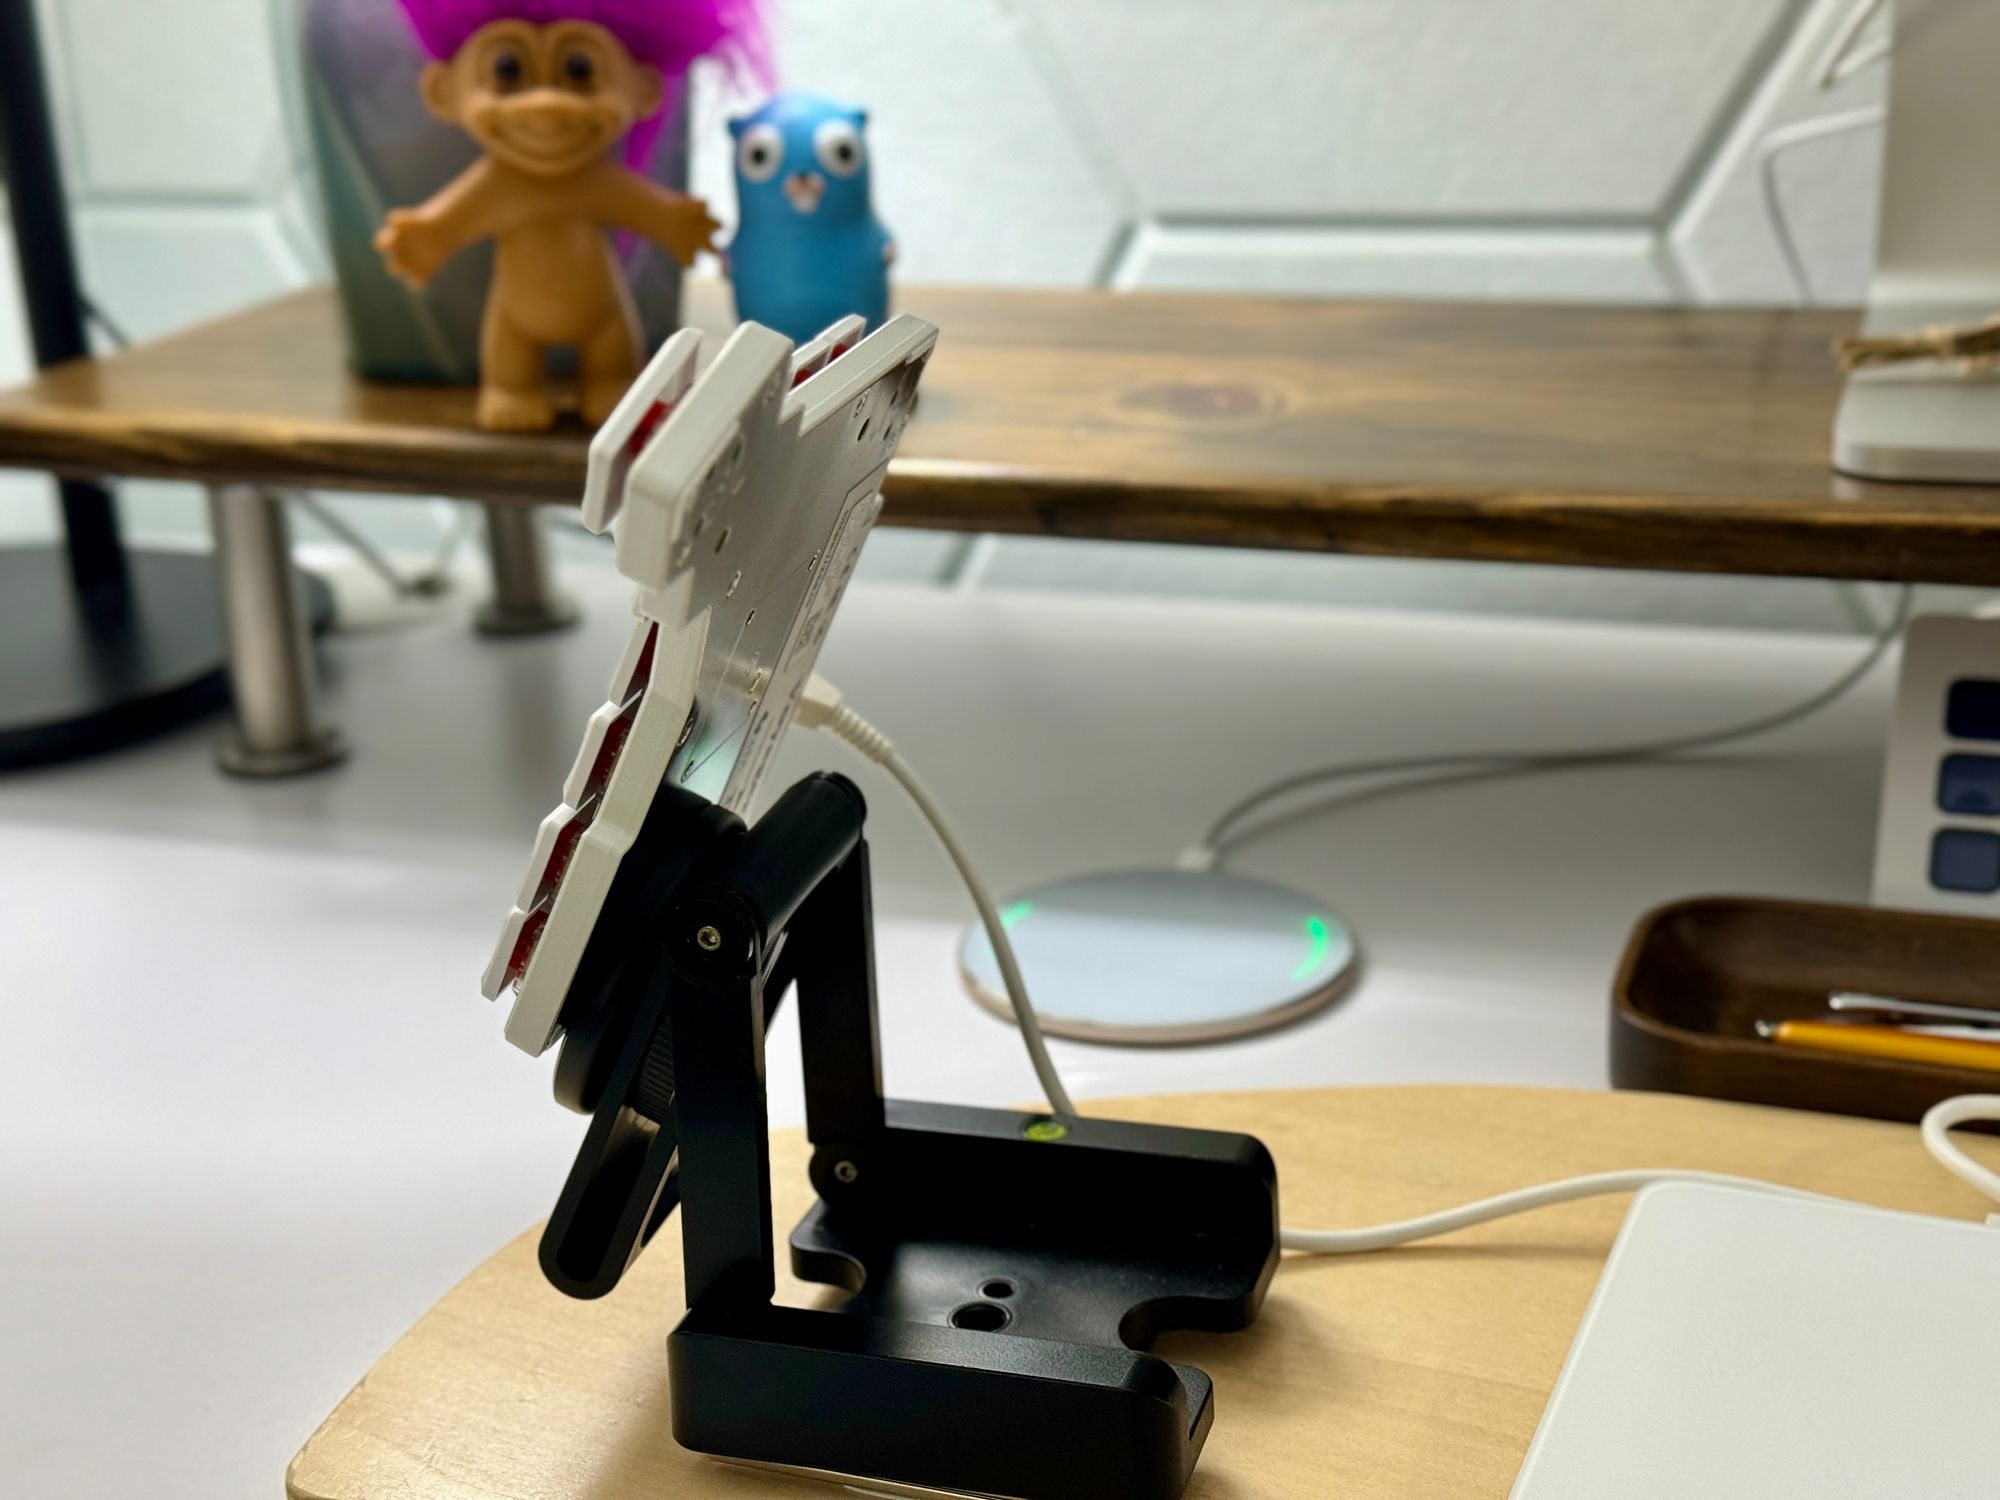
And I can achieve any degree of rotation:
All of these independent adjustments are available to me when I move to a new position or context:
- The angle of the "middle bar" of the Z-shaped mount relative to the lap desk
- The angle of the "top bar" of the Z-shaped mount relative to the "middle bar"
- The height of the bit of the Z-shaped mount that houses the screw
- The height of the placement of the tripod mount on the base of the Voyager
- The angle of the Voyager relative to my body
When I move into a new position, I let my hand achieve a natural position and then adjust one of more of the above until the keyboard is aligned perfectly to my hand and fingers, not the other way around.
On top of that, my layout keeps my fingers almost exclusively on the three main rows (home row and the rows above and below home), so I don't need to stretch my fingers. In fact, I don't use the two outermost keys of the top row at all! The pink dot stickers I added to the top row are to help me know which row I'm touching (apparently this is called "indexing"!). They're often called "jewel" or "gem" stickers, and these are the ones I have. I just had them on hand from an earlier project (bedazzling Flo masks!), so most of the stickers in that pack aren't suited to the keycap use case. So far they're staying on well, but if they start falling off I'm going to try using silicone glue to keep them on.
Keyboard bliss. 🩷